Posted 8 years ago
·
Author
In this tutorial, I will show you how you can quickly and easily add resources to your solution without having to use the interface and manually select the files. I will be using a C# WPF application and xaml styles but this method should be usable with any resource and may work on WinForms and other languages.
BACKGROUND
In WPF, you can create styles to customize the look and feel of your application. Now, if you're an avid developer, you'll probably want to reuse these styles in other applications.
If you've created your styles in reusable xaml files, this is very simple to do. However, if you have multiple styles and keep them organized in folders, adding them to a new solution becomes a bit tedious.
Following this tutorial, you should be able to easily add any number of resources to your solution with a simple copy & paste operation.
PREREQUISITES
This tutorial assumes you already have a solution created using resources of some form. Thus, it assumes you already have Visual Studio and have some understanding of how to use it.
This tutorial also assumes you know how to use your computer and are familiar with text editors and manipulating files.
INSTRUCTIONS
Step 1: Copy the resources from your first solution directory to your new one.
In my example, I have a folder called "Resources". The resource folder structure looks like this:
└── Resources
│ ├── Styles
│ │ ├── Modern.flat
│ │ │ ├── Modern.Flat.Button.xaml
│ │ │ ├── Modern.Flat.CheckBox.xaml
│ │ │ ├── Modern.Flat.RadioButton.xaml
│ │ │ └── Modern.Flat.TabControl.xaml
│ │ └── style.xaml
│ ├── icon_close.png
└── └── icon_min.png
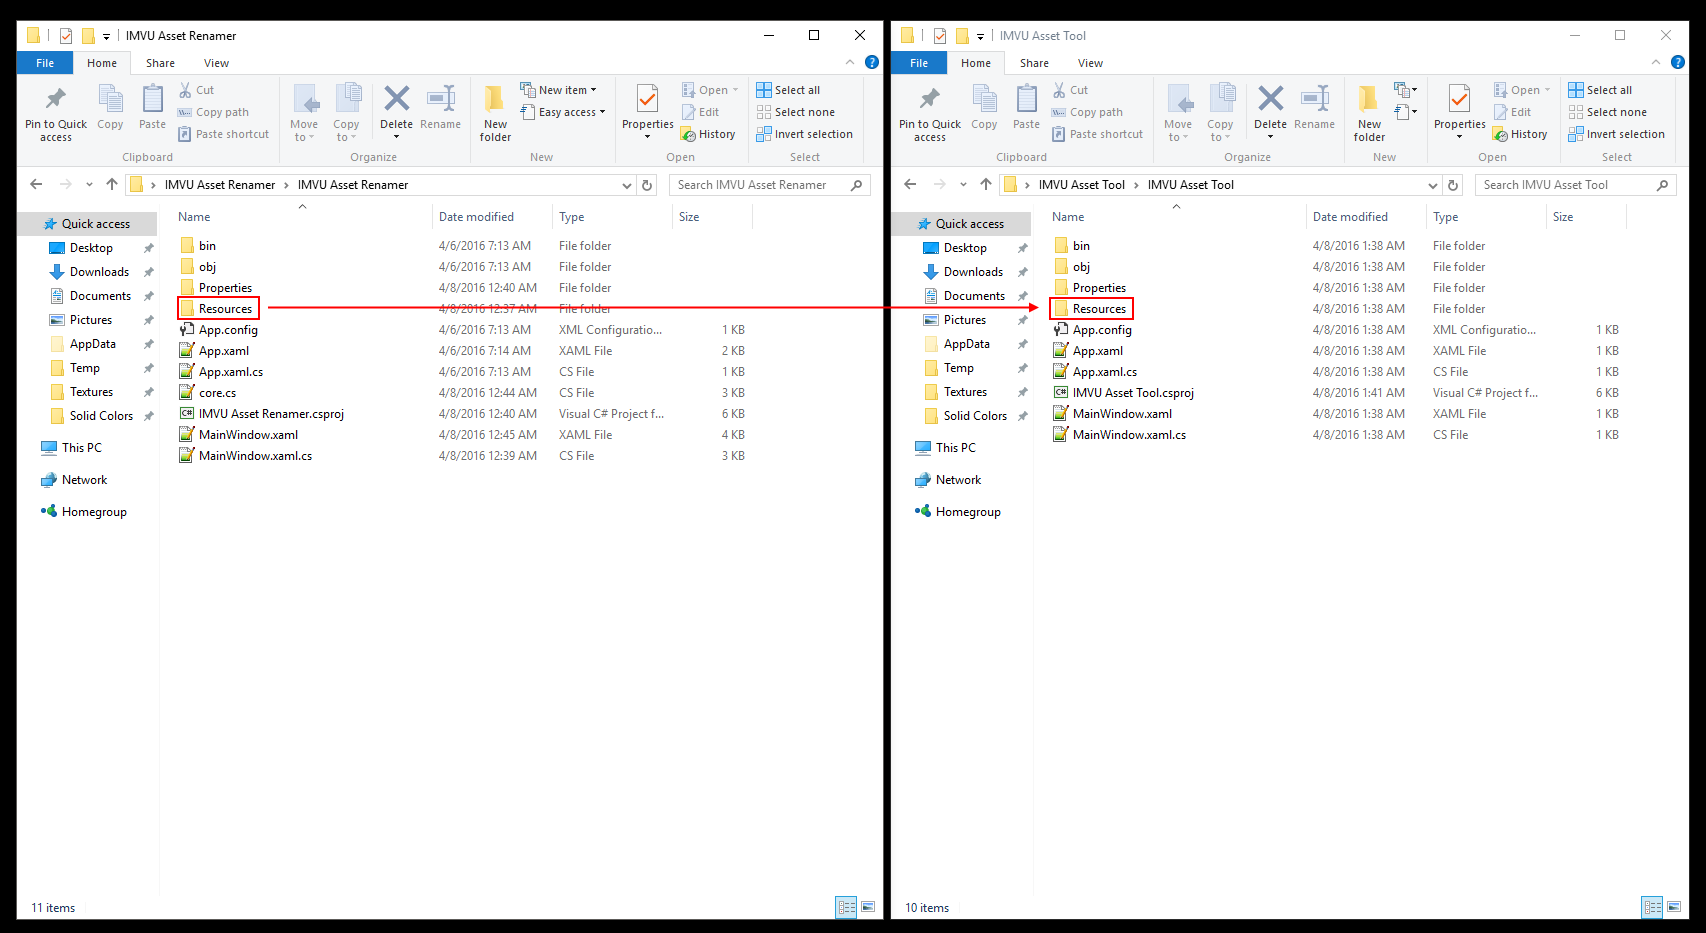
This resources folder and all the files inside of it are what I want my new solution to use.
Step 2: Open the .csproj file for your original solution in Notepad or any other text editor (I am using Notepad++ in this tutorial).
Step 3: Scroll down till you find your resources in the code.
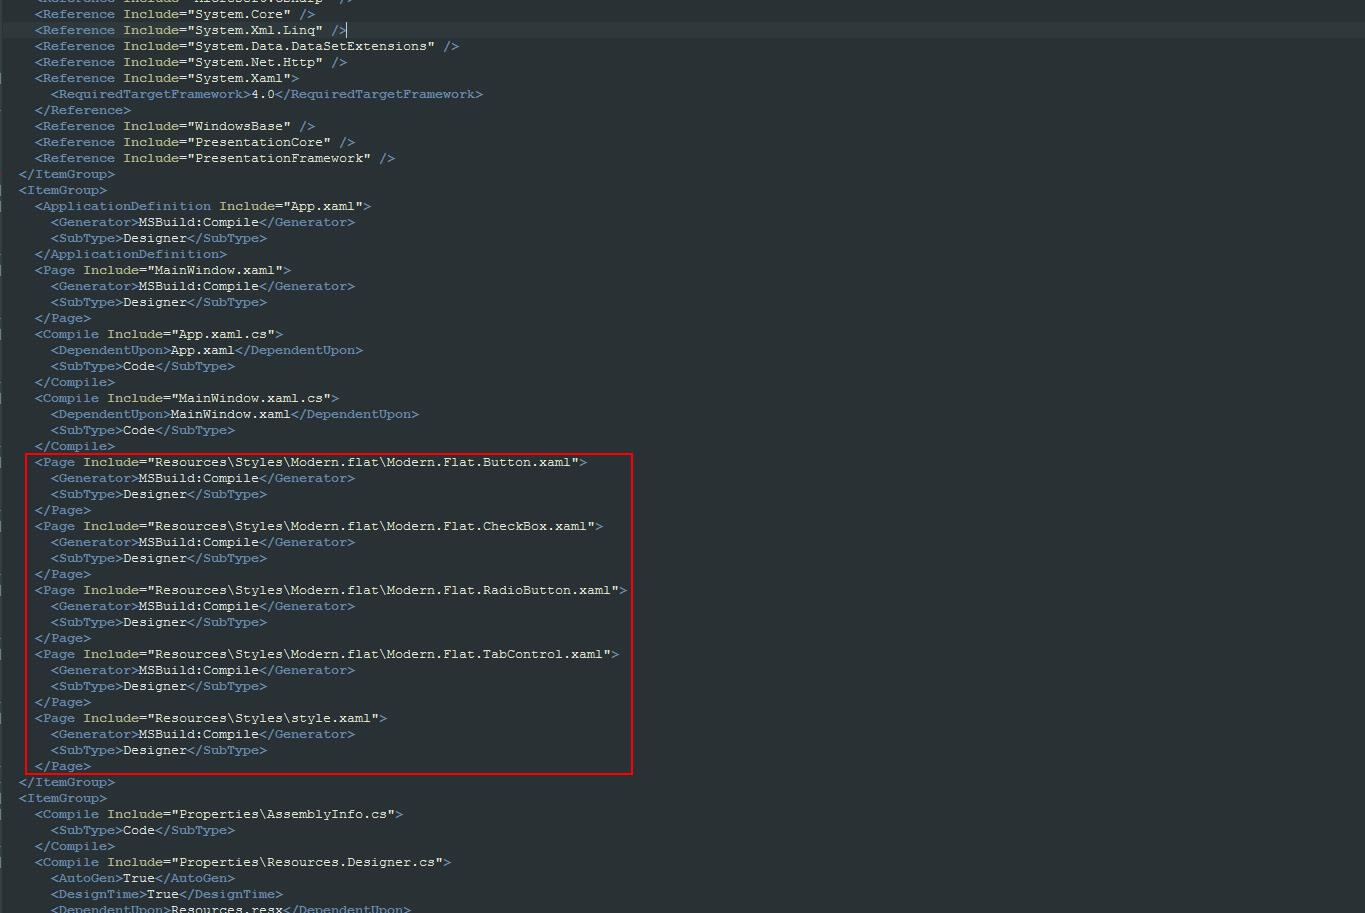
Take note of where the code is in the file. In my case, it was right below my form's class (MainWindow.xaml.cs).
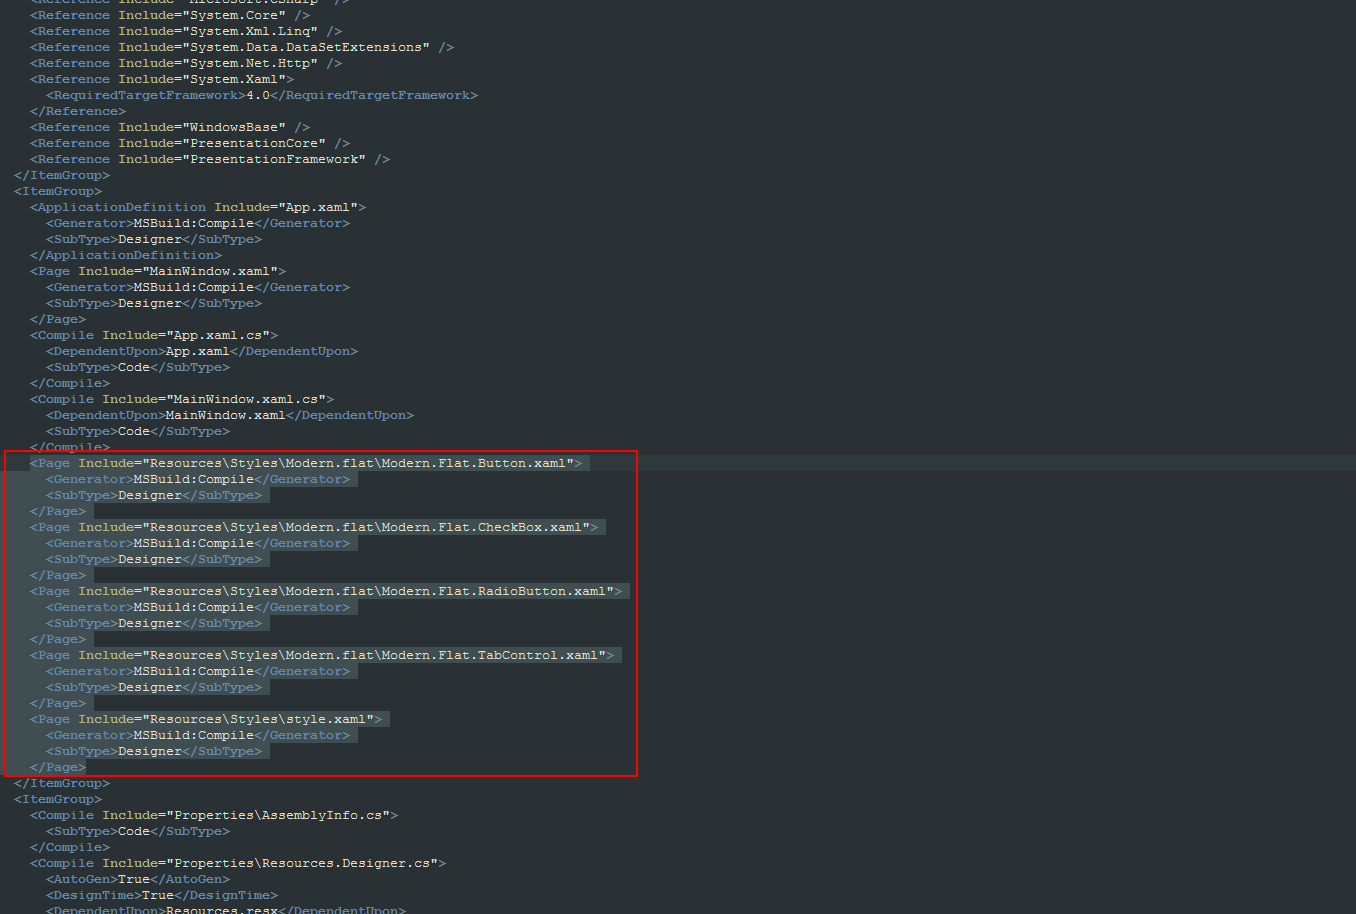
Step 4: Highlight all of the code making sure you copy all of the xml tags like so:
Step 5: Open the .csproj file for your new solution in Notepad or any other text editor (I am using Notepad++ in this tutorial).
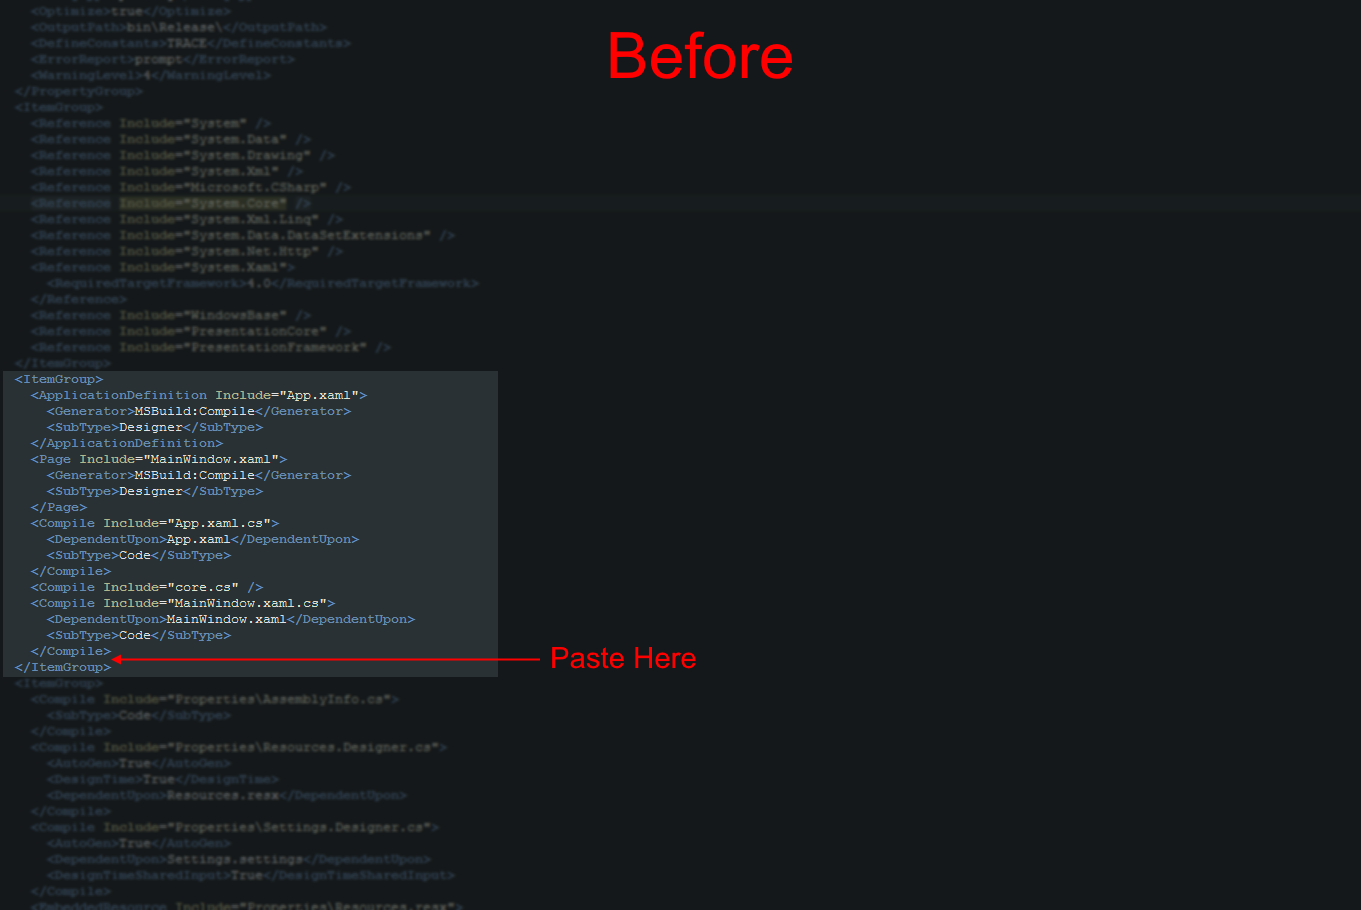
Step 6: Paste the code into the same place you found it in your original file. In my case, it was right before the closing itemgroup tag (</ItemGroup>) for the itemgroup block that contains the app.xaml decoration.
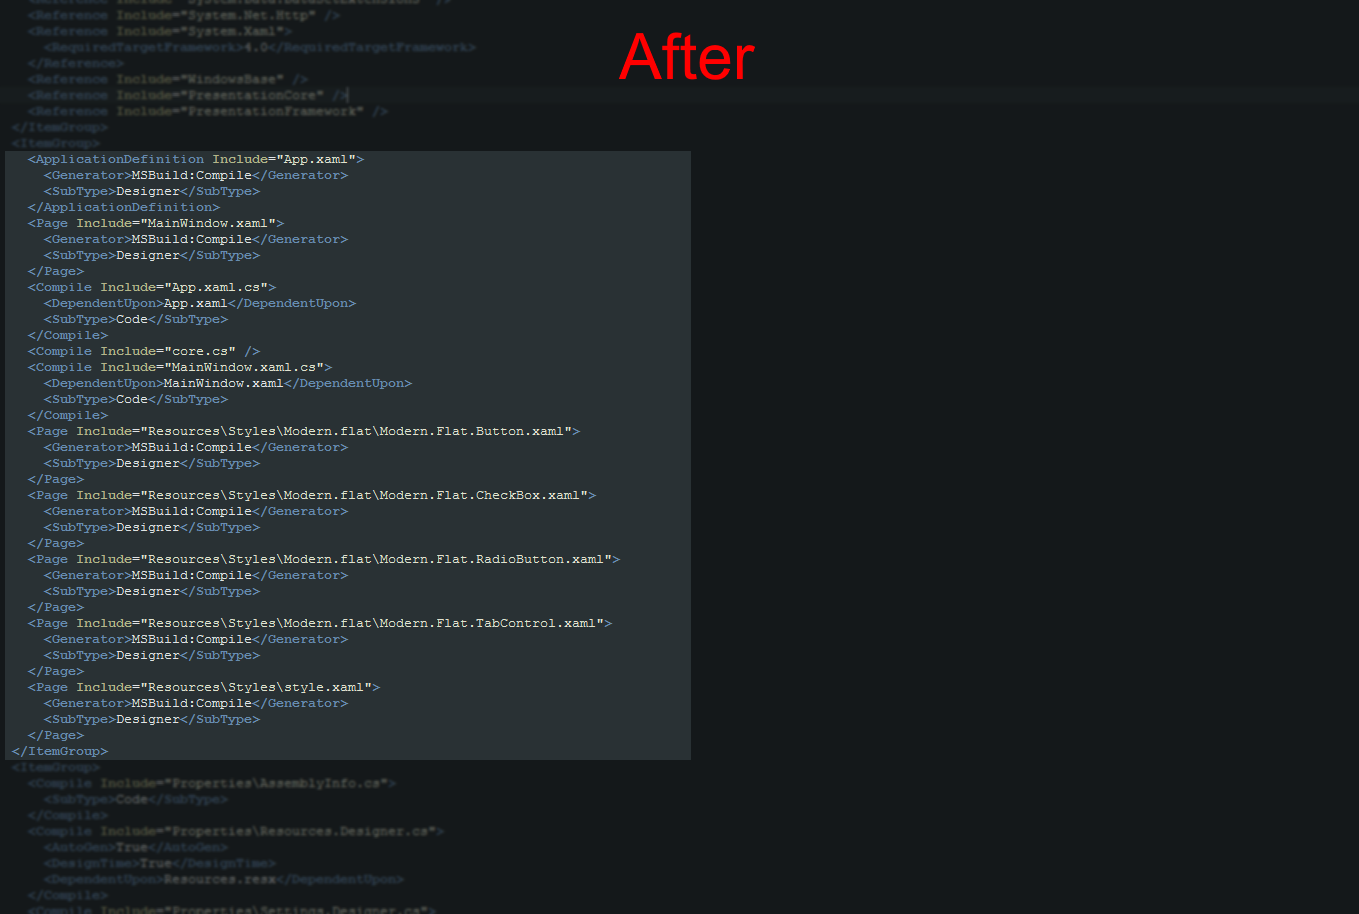
Step 7: Save the file.
Note: If you have the solutions open in Visual Studio while doing this, it will prompt you that files have been changed and ask if you want you load them, select yes.
That takes care of the xaml styles. Now we need to add the 2 icon png files that are also in my resources folder.
Step 8: Go back to the .csproj file for your original solution and find the code for the png files.
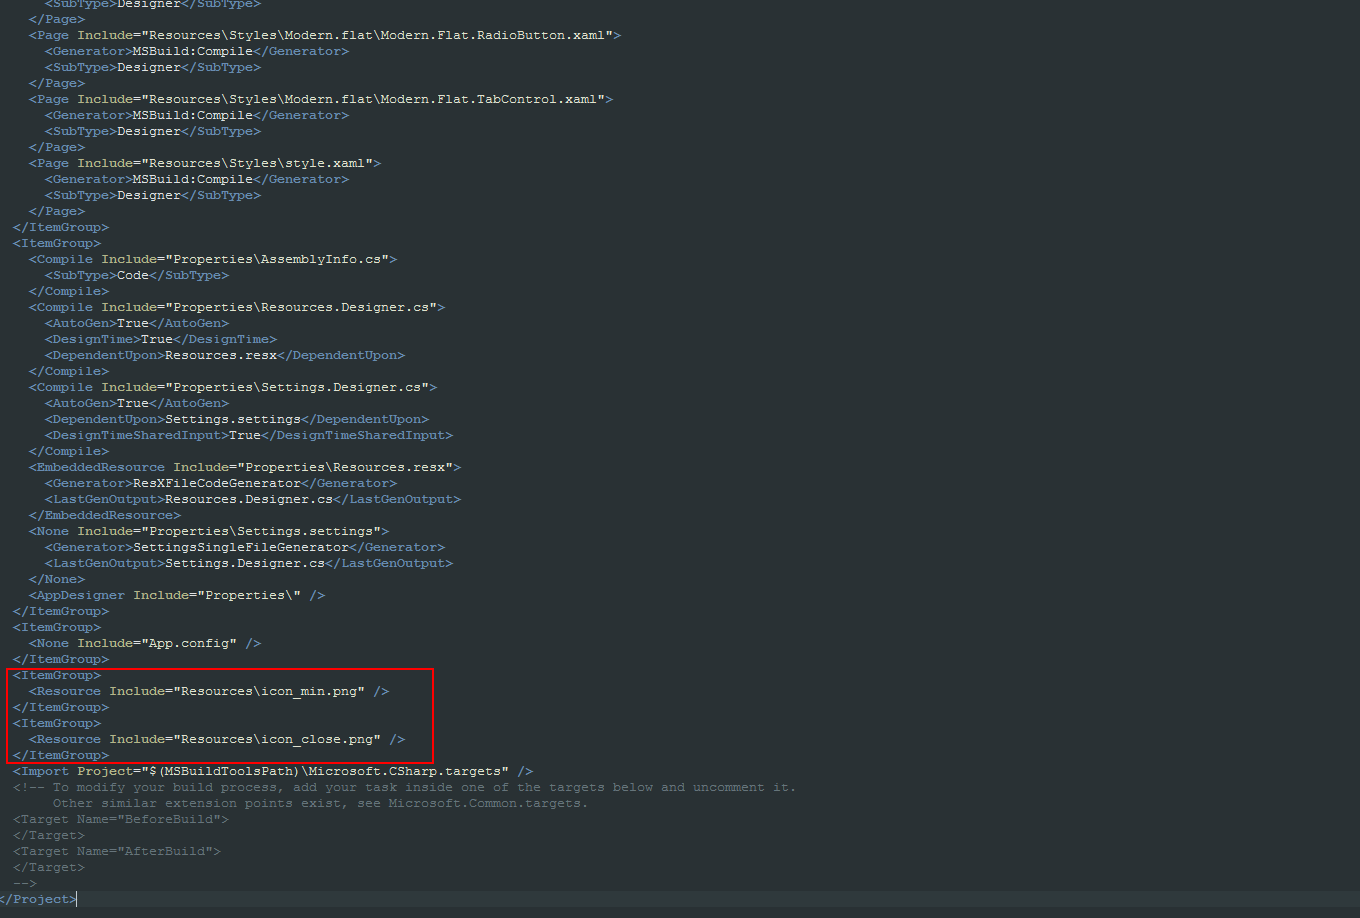
Step 9: Repeat steps 4 through 7 except this time, copy and paste the code for the png files and place it in the same location as the code in the original file.
Step 10: Copy and paste the applications resources references from you original app.xaml to your new app.xaml.
If done correctly, your new solution should now have all of your resources loaded. If you're proficient at using your computer, you'll find this technique to be much faster and convenient than manually adding each folder and file from the drop down menus in Visual Studio.
BACKGROUND
In WPF, you can create styles to customize the look and feel of your application. Now, if you're an avid developer, you'll probably want to reuse these styles in other applications.
If you've created your styles in reusable xaml files, this is very simple to do. However, if you have multiple styles and keep them organized in folders, adding them to a new solution becomes a bit tedious.
Following this tutorial, you should be able to easily add any number of resources to your solution with a simple copy & paste operation.
PREREQUISITES
This tutorial assumes you already have a solution created using resources of some form. Thus, it assumes you already have Visual Studio and have some understanding of how to use it.
This tutorial also assumes you know how to use your computer and are familiar with text editors and manipulating files.
INSTRUCTIONS
Step 1: Copy the resources from your first solution directory to your new one.
In my example, I have a folder called "Resources". The resource folder structure looks like this:
└── Resources
│ ├── Styles
│ │ ├── Modern.flat
│ │ │ ├── Modern.Flat.Button.xaml
│ │ │ ├── Modern.Flat.CheckBox.xaml
│ │ │ ├── Modern.Flat.RadioButton.xaml
│ │ │ └── Modern.Flat.TabControl.xaml
│ │ └── style.xaml
│ ├── icon_close.png
└── └── icon_min.png

This resources folder and all the files inside of it are what I want my new solution to use.
Step 2: Open the .csproj file for your original solution in Notepad or any other text editor (I am using Notepad++ in this tutorial).
Step 3: Scroll down till you find your resources in the code.

Take note of where the code is in the file. In my case, it was right below my form's class (MainWindow.xaml.cs).
Step 4: Highlight all of the code making sure you copy all of the xml tags like so:

Step 5: Open the .csproj file for your new solution in Notepad or any other text editor (I am using Notepad++ in this tutorial).
Step 6: Paste the code into the same place you found it in your original file. In my case, it was right before the closing itemgroup tag (</ItemGroup>) for the itemgroup block that contains the app.xaml decoration.


Step 7: Save the file.
Note: If you have the solutions open in Visual Studio while doing this, it will prompt you that files have been changed and ask if you want you load them, select yes.
That takes care of the xaml styles. Now we need to add the 2 icon png files that are also in my resources folder.
Step 8: Go back to the .csproj file for your original solution and find the code for the png files.

Step 9: Repeat steps 4 through 7 except this time, copy and paste the code for the png files and place it in the same location as the code in the original file.
Step 10: Copy and paste the applications resources references from you original app.xaml to your new app.xaml.
If done correctly, your new solution should now have all of your resources loaded. If you're proficient at using your computer, you'll find this technique to be much faster and convenient than manually adding each folder and file from the drop down menus in Visual Studio.
